Eclipse
Einleitung
Eclipse ist ein Rahmenwerk zur Integration verschiedenster Anwendungen. Eine solche Anwendung ist z.B. die mitgelieferte Java Entwicklungsumgebung JDT (Java Development Toolkit). Diese Anwendungen werden in Form sogenannter Plugins zur Verfügung gestellt und von der Eclipse-Plattform automatisch erkannt und integriert. Plug-Ins werden mit der so genannten Plug-In Development Environment (PDE), die mit ausgeliefert wird, entwickelt. Eclipse bietet weiterhin Funktionalität zum Verwalten von Ressourcen (normalerweise Dateien) auf der Festplatte. Diese befinden sich im so genannten Workspace, einem speziellen Verzeichnis im Dateisystem. Verändert eine Anwendung eine solche Ressource aus Eclipse heraus, werden auch die anderen Anwendungen - über entsprechende Benachrichtigungsmechanismen - davon erfahren. Der Benutzer arbeitet dabei immer in der Workbench, dem grafisch sichtbaren Teil der Eclipse-Plattform. Man kann mehrere Workbench Fenster geöffnet haben. Das konkrete Aussehen der Workbench wird von den gerade ausgewählten Perspektiven bestimmt. Diese fassen jeweils eine Menge von sogenannte Views und Editoren zusammen und stellen spezielle Befehle für die Menü- und Werkzeugleisten zur Verfügung. The first text in the title bar of the Workbench window indicates which perspective is active.
![]()
Different Perspectives can be selected with:
![]()
The primary use of Views is to provide navigation of the information in the Workbench. Je nach View werden nur Teile oder auch innere Zusammenhänge zwischen den Ressourcen angezeigt. A perspective determines which views may be required and displays these on the Windows->Show View sub-menu.
Ein Editor dient zum Bearbeiten einer Ressource. Hierbei wird ein strikter Laden-Verändern-Speichern Lebenszyklus eingehalten. Erst wenn eine im Editor veränderte Ressource auch gespeichert wird, können alle oben erwähnten Benachrichtigungsmechanismen greifen. Spezielle Views können auch direkt mit einem Editor (und nicht mit der eigentlichen Ressource) gekoppelt werden. Zum Beispiel ist der Outline View der Java-Perspektive direkt an den Java-Quelltexteditor gekoppelt. Eine Besonderheit bei Eclipse - und teilweise Grund zur Frustration - ist nun die äußerste Flexibilität, mit der vorhandene Views und Editoren kombiniert werden können. Nicht nur die Anordnung in der Workbench ist frei wählbar. Man kann in eine geöffnete Perspektive jeden anderen View und jeden Editor hinzufügen - auch wenn diese in einem ganz anderen Plugin definiert wurden. Dies ermöglicht es dem Benutzer, eine auf ihn zugeschnittene Entwicklungsumgebung zusammenzustellen.
Eclipse can be configured (Window->Preferences->General->Workspace->Local History) to keep a local history.
Plug-In Installation
see http://www.venukb.com/2006/08/20/install-eclipse-plugins-the-easy-way/
Versions
- 4.2 Juno 2012
- 4.3 Kepler 2013
- 4.4 Luna 2014
- 4.5 Mars 2015
- 4.6 Neon 2016
- 4.7 Oxygen 2017
Upgrade
Upgrade eclipse itself requires a complete new download. To upgrade plug-ins you can use Help -> Software Update -> Find and Install ...
Rich Client Platform
Eclipse Packaging Project (EPP)
Packaged Eclipse IDE for different languages.
Configuration of Version 2022-06 2022-09
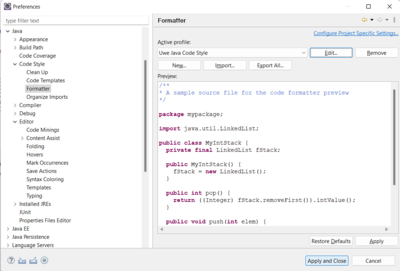
Java Code Style
- Windows -> Preferences

Icons
- see here
Views
Ant View
Breakpoints View
Debug View
Project Explorer
- View Menu -> Link with Editor
The Navigator View provides a hierarchical view of the resources in the Workbench including hidden files.
Logging
Das Logfile liegt unter <eclipse-dir>/workspace/.metadata/.log.
Plug-Ins
Angular IDE
- installed via eclipse marketplace
Ant
Das Ant-Plug-In ist integraler Bestandteil von Eclipse. Ein Ant-Build fügt man an folgender Stelle in den Properties eines Projekts ein:
und kann dort editiert werden. Der AntBuild kann entweder mit dem konfigurierten Target (s. 2. in Screeshot) oder aber mit einer manuellen Auswahl des Targets mit Doppelklick (s. 3. in Screenshot) erfolgen: CallAntFromEclipse.jpg
EGit
- Egit is the Eclipse standard and in most cases part of an Eclipse distribution
- tutorial and detailed description see here
- installation s. Help -> About Eclipse IDE -> Installation Details -> Plug-Ins -> Filter to EGit
- available view s. Window -> Show View -> Others -> Git
- Git Staging
- Git Repositories
- History
- for adding, commiting and pushing use the 'Git Staging' view starting with 'Unstaged Changes' and adding or ignoring and committing or see below
Egit uses the same configuration files as git. The label decoration is shown in the views 'package explorer', 'project explorer' and 'navigator'.
Text Decorations
- see Window -> Preferences -> Git -> Label Decorations -> Text Decorations
Icon Decorations
The decorations icons are:

Gitting an Eclipse Project
There is a discussion if you should put multiple projects in one git repository or having a git repository for each eclipse projects. It seems that the second options is better if the projects are not related. The same applies to what should be included in a git repository and what should be ignored (see here).
See list below which files and folders should be in scope of git:
- \src\...
- \.settings\ // if projects settings differ from workspace settings
- \.classpath // e.g. what is the source, where does the class files go, ...
- \.project
See list below which should be ignored:
- \bin\... // or anything which can be recreated
- Right click on project -> Team -> Share Project
- Select repository or create a new one // moves the complete project to the repository
- select files or folder and Team -> Add/Ignore
Adding a file to the Index
- Right Click on File -> Team -> Add to Index
Unignore File or Directory
- edit .gitignore and delete the rows
- add to file to index
Committing Changes
- Right Click on Project -> Team -> Commit opens the commit view
Creating Project from Local Repository
- File -> Import
- Git -> Projects
- Existing Local Repository
- Select Repository Directory
- Import as General Project
- Right Mouse on Project -> Configure -> ...Facet...
- Select Java (and additional)
Show Differences
- right click on project resource -> Compare with
Maven
Name is M2E. Documentation can be found here.
If you have added a dependency manually to pom.xml then right click on project -> Maven -> Update Project.
PDT
- s. Installation of PDT
- adjust php.ini for XDebug
- adjusted Window->Preferences->PHP->Debug and PHP Executables
BPMN2 Modeler
- Help -> Install new Software -> http://download.eclipse.org/bpmn2-modeler/site
JBoss Tools
Installation
- Add Site http://download.jboss.org/jbosstools/updates/stable, check checkbox and press install
Description
The JBoss Tools are somehow an extension of the Java EE WTP Tools. The JBoss Tools contain a set of tools for Hibernate among others tools for reverse engineering an existing database and code generation. The documentation is here. My description is here
JDT
The Jave Development Tools adds a Java project nature and Java perspective to the Eclipse Workbench as well as a number of views, editors, wizards, builders, and code merging and refactoring tools. The JDT project allows Eclipse to be a development environment for itself.
Spring Tools
- was called STS
- installed via Help -> Eclipse Marketplace (will not work in Eon CN)

Subversion
Subclipse
Installation
- Help->Software Updates->Find and Install...
- Search for new features to install
- New Remote Site
- http://subclipse.tigris.org/update_1.2.x
- Restart
Using
If you add a file to your project, it's not automatically part of version control. Right-click the new file, then choose Team -> Add to Version Control. If you've added a file to the repository that's no longer relevant to your project, you can easily delete it. Right-click the file, then choose Delete. No need for the Team menu. To rename a file or directory under Subclipse's control, right-click it, then choose Rename. Type the item's new name in the entry field and click Enter. The file is renamed in the project, and the rename operation (an Add for the new name, and a Delete for the old one) is queued for your next commit. If your project generates files, or otherwise includes files that you don't want to check in to the Subversion repository, you can tell Subclipse to ignore them. Right-click the file or directory you want to exclude from version control, then choose Team > Add to svn:ignore to display the Add to svn:ignore dialog. To ignore an already added file from a repository delete it with the SVN Repository Perspective and then sign it as svn:ignore.
WTP
Workspace
JBoss 7 Quickstarts
- File -> Import -> Existing Maven Projects -> C:\Uwes\java\jboss\jboss-as-quickstarts-7.1.0.Beta1b
Bedienung
Show Bin Directory in Project Explorer
- Window -> Show View -> Project Explorer
- Select little triangle at top right -> Customize View ...
- Filters -> deselect 'Java Output Folder'
Show Open Files
- CTRL + E or
- CTRL + SHIFT + E
Show Hidden Files
- like .gitignore
- select project in Project Explorer and click the filter icon on top bar
- deselect .* resources
Create a new JBoss 7 Maven project
- File -> New -> Project -> Other -> Maven -> JBoss Archetype -> jboss-javaee-webapp
Create a Java Project from existing file system
- copy folder to eclipse workspace folder
- right click navigator->new project->Java
- name the project like the project folder
Create PHP Project from Filesystem
- right click navigator->new project->PHP
- insert the path of the root manually (otherwise crash)
Lookup library for Java element
- select in editor and right click
- Open declaration
- Package or Project explorer (left window)->Link with editor (icon with arrows to left and right)
Create new HTML page
- right click folder -> new -> others -> web -> html file
New JPA Project
- new project->JPA->JPA procect
New JPA Entity
- see also JPA entities
- right click on package below Java Resources -> new Class
- add fields in Java code to new class
- right click on classname -> Source -> Generate Setters and Getters
- right click on classname -> Source -> Generate Hibernate/JPA Annotations
- create DB table or deployment will create DB table in case persistence.xml contains <property name="hibernate.hbm2ddl.auto" value="create-drop" />
Revers Engineer a database with Hibernate
For reverse engineering perform the following steps in eclipse:
- create a Hibernate Console Configuration via File->New->Other->Hibernate->Hibernate Console Configuration (edit it by changing to the perspective Hibernate) and double click in the Hibernate Configurations view
- specify Database Connection, Property file, Hibernate configuration file. The rest seems to be unneccessary.
- Run->Hibernate Code Generation...->Open Hibernate Code Generation Dialog...
- Create a new Code Generation Configuration or edit an existing
- specify the existing output directory
- specify via the reveng.xml setup dialog the tables for reverse engineering
- select the exporters
- press Run or later Run->Hibernate Code Generation-><Code Generation Configuration>
Anzeigen der Plug-Ins
- Help -> About -> Plug-In Details
Perspektiven öffnen
Window -> Open Perspective ...
Source Verzeichnis einrichten
- Project Properties
- Java Build Path
- file card 'source'
Configuration and Using of Server
- File -> New -> Other
- Windows -> Show View -> Server
Deploy to Server
- e.g. JBoss AS Quickstart 'right click project -> Run As -> Run on Server' will build the project, copy the war file to the deployment directory and call the browser
Tastatur/Keyboard
see also http://www.allapplabs.com/eclipse/eclipse_shortcuts.htm
| CTRL + K | find selection next |
| CTRL + N | new structure |
| CTRL + L | goto line |
| CTRL + <Dot> | Focus in Search results goto next find |
| CTRL + <Space> | Code Completion or Java API Documentation |
| CTRL + SHIFT + B | Breakpoint einfügen |
| CTRL + SHIFT + C | compare with other resources, resource must be selected in project explorer |
| CTRL + SHIFT + K | find selection previous |
| CTRL + SHIFT + P | find matching brace (cursor behind brace) |
| CTRL + SHIFT + T | open class search dialog |
| F6 | Step over |
Getter/Setter generieren
- right click in editor
- Source->Generate Getter/Setter
Java Files Formatieren
- select file in project navigator
- context menu -> source -> format
Compare Files
- select files to compare in project navigator (CTRL+left mouse)
- context menu -> compare with -> each other
Compare with external File
- select resource in project explorer
- CTRL + SHIFT + C
Adding a jar file to the build path
- see here
or you can now either add a JAR file which is contained in your workspace or which is somewhere else:
- to add a JAR file which is inside your workspace click the Add JARs button
- to add an external JAR file click the Add External JARs button
Using the type hierachy
- F4 actualizes the type hierachy with the current class in the editor
Debugging
Java Remote Debugging
For example uweheuer:
- start Wildfly for Debugginging
- select 'Debug Configuration' form Debug Menu and press 'Debug'
- after change to Debug View set breakpoints
Java Applet Debugging
There is a integrated applet viewer but setting breakpoints doesn't work, so it's better to use remote debugging. For example configuration 'uweheuer_applet_laptop'. Precondition is the configuration of the java runtime for applets:
- MS Windows: s. Windows Java Configuration
- Ubuntu: s. Ubuntu Java Configuration
PHP Debugging
s. http://www.eclipse.org/pdt/documents/XDebugGuideForPDT2.0.pdf
- set breapoints
- Run->Debug Configurations...-> e.g Local XT Sport Boeckmann -> Debug
Convert a project to a java or javascript project
- right click project in project explorer
- properties
- project facets
or
- open .project
- add
<buildSpec>
  <buildCommand>
    <name>org.eclipse.jdt.core.javabuilder</name>
    <arguments>
    </arguments>
  </buildCommand>
</buildSpec>
<natures>
  <nature>org.eclipse.jdt.core.javanature</nature>
</natures>
Set Preferences for HTML Editor
- Window->Preferences->Web->HTML Files->Editor
Use the jQuery Mobile Palette
- right click on HTML file -> Open With -> JBoss Tools HTML editor => Palette will be available as tab in the bottom area
Insert jQuery Mobile link to HTML file
- click JS/CSS icon in palette
Browser Sim
- Icon in icon bar or
- Right click on html file -> Open With -> Browser Sim
Javascript console goes to Console tab in the bottom, perhaps select by icon 'Display selected console'
Einschränkungen
Eine Aufteilung der Sourcen in unterschiedliche Verzeichnisse unabhängig von der Package Struktur ist nicht vorgesehen.
Sources
- my own diagrams s. eclipse.vsd in file:///C:/Uwes/jspwiki/graphics/eclipse.vsd
- Eclipse wiki http://wiki.eclipse.org/